Shaft and Bushing parts
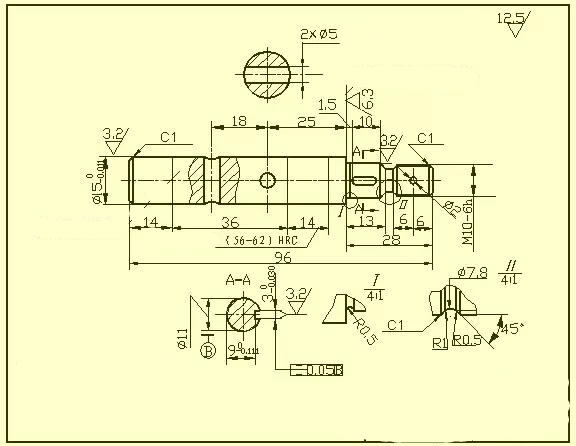
Such parts generally have parts such as shafts and bushings. When the view is expressed, as long as a basic view is drawn and the appropriate section and dimension are drawn, its main shape features and local structures can be expressed. In order to facilitate the drawing when processing, the axis is generally projected horizontally, and it is preferable to select the position where the axis is a side perpendicular.
When dimensioning a bushing-type part, its axis is often used as a radial dimension reference. Thus, Ф14 and Ф11 (see A-A section) shown in the figure are taken out. In this way, the design requirements and the process reference during machining (the shaft parts are machined on the lathe, and the thimbles at both ends are placed against the center hole of the shaft) are unified. The reference in the length direction often uses important end faces, contact faces (bearing shoulders) or machined faces.

As shown in the figure, the right shoulder with a surface roughness of Ra6.3 is selected as the main dimension reference in the length direction, thereby injecting dimensions of 13, 28, 1.5, and 26.5; and then the right axis end is the length direction. The auxiliary base, thus marking the total length of the shaft 96.
Scan to wechat:
